Hatching Chicken Eggs: 10 Tips
By Jennifer Murtoff, Home to Roost, LLC
Courtesy of Wrangler Network contributor Scoop from the Coop
You’ve decided to hatch chicken eggs! Beyond the basic incubation instructions, how can you improve your hatch? Read on for some tips to get the most out of the eggs you set.
You’ve got your incubator and fertilized eggs, and you’ve read all the instructions on hatching and caring for chicks. Here are some tips for a good hatch.

Small modern incubator for various egg sizes with turning motor and ventilation
Prepare well: Carefully follow the instructions that come with your incubator regarding humidity, temperature, egg turning, and location. Small changes in environment can have large consequences. Run the incubator for several days before setting the eggs and monitor the conditions. Make adjustments if needed. This ensures that the temperature and humidity will be consistent, and that the incubator is working properly when you’re ready to set the eggs.
X (and O!) mark the spot: If you are turning eggs by hand, mark a X on one side and an O on the other so that you can tell which side of the egg is facing up. Be sure to use a pencil: eggs can absorb toxins from inks.
No peeking: Open incubator as little as possible to prevent heat and humidity loss. A consistent temperature and humidity are important for the development of the eggs.
Check for development: Candle a few eggs at a time after day 7 and remove any that are infertile or that have stopped developing. This prevents harmful gases from circulating in the incubator. Hold the eggs over a candler or powerful flashlight. Note: It’s harder to candle eggs with dark shells.

A candled egg showing embryo
Prepare the brooder: A day or two before hatching, set up your chicks’ new home, or brooder, in a room with a consistent temperature. Monitor the temperature to ensure that it is consistent. Make sure you are prepared with a feeder and waterer for chicks.
Good feed, good start: Buy your chick starter or a starter/grower before the chicks hatch. A quality feed gives your birds the best start possible. You can learn more about medicated vs. nonmedicated chick feeds in this video and this article.
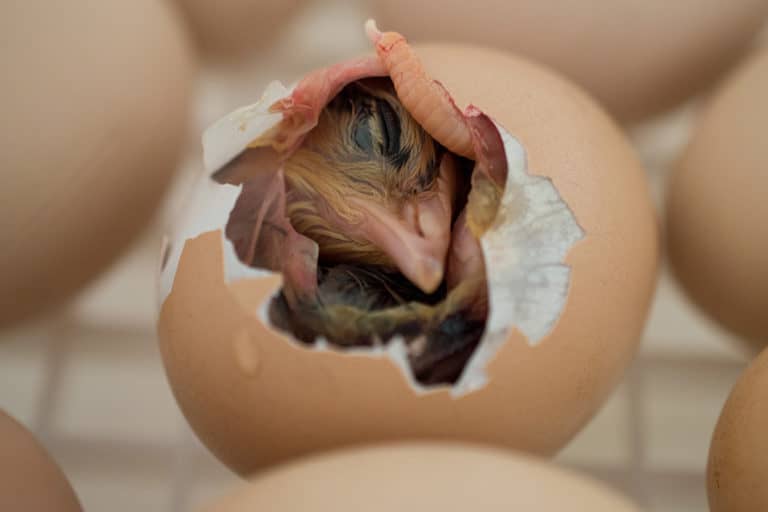
Let Mother Nature do it: Resist the urge to help chicks out of the shell. You can harm the chicks if you remove them too soon. This long process can take as many as 24 hours, and the healthy, strong ones will make it out. Leave viable eggs in for up to two extra days.

Egg that has been pipped, with chick’s beak visible
Let them dry off: The chicks will be damp and may not move a lot after they hatch. Hatching is exhausting! Leave the chicks in incubator until they are fully dry and fluffy. Then you can transfer them to the brooder box.

A newly hatched wet chick
Clean up: When the hatch is done, use a solution of 10% bleach/90% water to sanitize the incubator. Then wash it with warm, soapy water and rinse thoroughly. Always clean between hatches to prevent disease transmission.
Now get ready to enjoy your new chicks!


